Are you already considering installing a solar panel in your RV? If not, we think you should.
Unlike modern generators, solar panels are silent, require minimal maintenance, and are a source of clean energy. Plus, solar power is abundant and exists freely- anywhere you get sun is a place to power up!
Installing solar panels on your RV is easier than most people think. All you need is clear steps and instructions on how to get it set up.
In this guide, we’ll teach you step by step how to hook up a solar panel to your RV battery correctly, so you can power all your RV appliances with solar energy.
Before we get into installation, let’s look a bit at some fundamentals.

What Size Solar Panel Do I Need for My RV Battery?
Before you can install a solar panel, you need to pick the right size panel. If you pick the wrong size that is too small, you may not be able to fully charge your battery on the road.
Put simply, solar panels sit on top of the RV, take in the sun’s energy, and convert that energy to power your RV battery through wires. If your solar panel isn’t big and powerful enough, it won’t be able to take in enough energy to supply your battery to operate all the appliances you need it to in the vehicle.
Minimum Wattage
From our research, a 300-400-watt solar panel is sufficient to keep most lithium RV batteries fully charged when you have access to direct sunlight. Lithium batteries pair best with solar panels, due to their performance and compatibility.
If you’re on a tight budget, a 200-watt solar panel should be enough to power most of the electronics in your RV, including fans, lights, phone chargers, and small appliances. But if you have a microwave, TV, or any other high-powered electronics, you’ll need a solar panel closer to around 400 watts.
When in doubt, there are several different solar calculators online that can help you find the right wattage requirements for your specific RV battery. Though you should keep in mind that this is just an estimate, and isn’t always entirely accurate.
If you end up coming up short on your power, you can always install an extra solar panel later on.

How to Install a Solar Panel to Your RV Battery
While installing a solar panel to your RV battery may seem complicated, it’s actually pretty easy if you know what you’re doing.
First, you need to buy the essential supplies for installation:
What You Need
- RV battery
- Solar panel
- Solar charge controller
- 10AWG cable
- 10AWG connectors
- Mounting brackets (optional)
- Inverter to power 120-volt appliances
The easiest way to get all of these parts is to buy a complete solar kit for your RV. This kit will include everything you need to power your RV battery and hook up your solar panel. Plus, it could save you more money than if you bought all the pieces individually.
Follow These Steps
1. Connect your RV battery to the tray cable controller by attaching the red wire to the positive terminal and the green wire to the negative terminal. Ensure you tighten all the screws properly.
2. Connect the tray cable to your RV battery by attaching the red wire to the positive terminal and the green wire to the negative terminal.
3. Connect the solar panel’s 10AWG female connector to a 10AWG male connector.
4. Connect the 10AWG male connector on the solar panel to a 10AWG female connector OR MC4 connector.
5. Connect the solar panel by linking the negative terminal and negative port on the charging mechanism.
6. Attach the positive terminal on the solar panel to the positive terminal on your charge controller. Strip the wires at the ends to ensure they connect appropriately to the corresponding charge controller.
7. (Optional) Connect the inverter by connecting the battery’s negative terminal to the inverter’s negative terminal. Do the same with their positive terminals.
NOTE: Not all solar panels need an inverter. If you need solar power to power appliances like a blender or a computer, you need AC power. This inverter is easy to install. Just attach the inverter to the RVs battery on its terminals and add a circuit breaker to regulate power between the battery and inverter.
After you install the solar panels, the charge controller will recognize them and measure their wattage. Remember you can’t turn the solar panels on manually as they automatically generate electricity when you expose them to the sun.
To avoid damaging the essential components during installation, ensure you carefully read the installation instructions with the solar kit you buy. Each kit might have different connection requirements.
If the installation process sounds too complex for you, consider contacting a professional for installation. You can also look up several installation videos online to help you further.
Where to Put Your Solar Panel
Now that you’ve installed your solar panel, you need to figure out where it is best to mount it. You ideally want it in a place that will easily get exposed to direct sunlight. On most RVs, the most obvious and ideal place is the roof.
If you’ve bought a full solar kit, it may already come with roof mounting brackets. Follow the instructions that came with your kit to correctly and securely attach your solar panel to the roof of your RV.
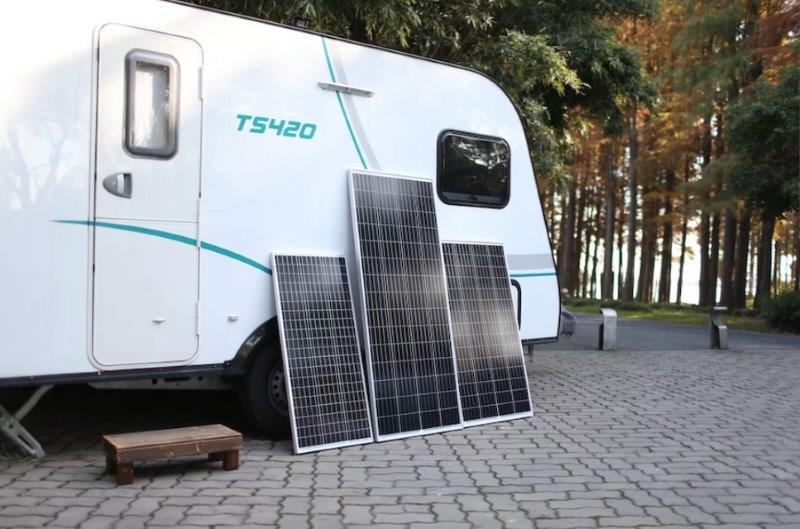
You don’t have to attach your solar panels to the roof if you don’t want to. Many users opt to manually set up their panels wherever they go, so they can place them in particularly sunny spots. Simply place them outside when you need them, and pack them up inside until you’re ready to use them again.
If you choose this method, always protect the charge controller from the outside elements. To make it easy, we recommend mounting it near your RV battery to keep it safe.

Conclusion
Solar panels are a simple and effective way to keep your RV charged and ready to go at all times. By following these guidelines, you should be able to install solar energy panels on your RV with ease.
As mentioned earlier, you can always hire a professional if you get stuck during installation.
If you’re ready to hit the road with your solar panel set up, consider taking a look at some of the best RV camping spots in the United States for inspiration for your next adventure!

No Comments